This post contains affiliate links. As an Amazon Associate I earn from qualifying purchases
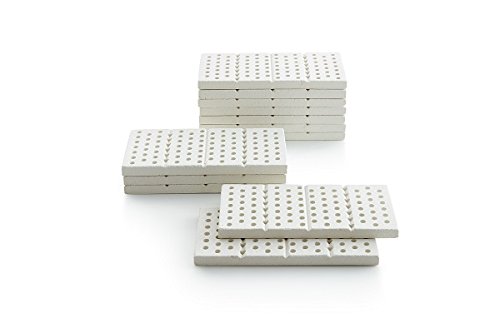
Enhance the BBQ flavor of your grilled food by using our Grill Tiles. This Grill Tiles replaces briquettes and lava rocks. Our unique design allows you with the use of your hands to break the tiles as needed to configure to any grill size (Snap technique).
Please follow the instructions in packaging for better results. BBQ KING GRILL TILES is the only plate in the market that allows easy partitioning for installation.
1. Remove top cooking grill.
2. Remove any fire deflectors from grill.
3. Install Grate for the tile placement as leveled possible. You can place tiles on the sides of the grate for support and better balance. (Grate NOT included)
4. Place Ceramic Grill Tiles over the grate and allow 1″ spacing between each ceramic grill tile on every direction to allow excess heat to exit from bottom to top of the grill.
5. The design with cleavages on the ceramic tiles to allow partitioning of the tiles if needed during installation.
6. Space between the grate for tiles and cooking grill should be 2 ½” for better performance.
7. Install top cooking grill and start grilling.
8. The Ceramic Grill Tiles are self-cleaning. Just turn them around when the tiles are cold and fire will burn any residues away.
*CAUTION: ONLY HANDLE TILES WHILE COLD. SEVERE BURNS CAN OCCUR IF HANDLED WHILE HOT OR AFTER GRILLING.
If too much flare ups is occurring due to grease drippings, please lower the heat on your grill to minimum and continue grilling. Increase heat as desired until optimum results achieved *One Box of KING Ceramic Grill Tiles will be enough for an average medium grill* *Do not place food directly on Ceramic Tiles. Do not get BBQ King Ceramic Grill Tiles wet.
Product Features
- Upgrade your Grill with these 15 Ceramic Grill Tiles to Cover 270 square inch of Grill area adaptable to any grill size. All you have to do is to snap the tile accordingly to your need and place them in top of a grate located above the gas burners.
- Reduces Cold Spots on Grill surface since the ceramic tile distributes the heat evenly for better cooking results, while at the same time improves the gas consumption.
- Reduces flare ups allowing food to get cooked by Heat and Not by Flame. Maintain the food juices for better tasting.
- Enhances BBQ flavor in grilled foods. Barbecue to perfection hot dos, burgers, steak, veggies and other food
- Made in Europe
Audible Annual Paid Membership
Gift of Audible 12-month Membership Plan
Kindle Unlimited 24 Month Paid Membership
Audible PLUS Paid Digital Membership
Gift of Audible 3-month Membership Plan
Gift of Audible 6-month Membership Plan
Gift of Audible 1-month Membership Plan
Kindle Unlimited 12 Month Paid Membership
SNAP EBT Enrollment
Audible PLUS Free Trial Digital Membership
The Drop Text Alerts
Kindle Unlimited 6 Month Paid Membership
Amazon Prime for Young Adults 6-month Trial
Amazon Baby Registry
Amazon Wedding Registry
Amazon Prime Free Trial
Kindle Unlimited Free Trial
Amazon Home Services
Prime Gaming
Amazon Prime Discounted Monthly Offering
Amazon Kids+ Free Trial
Amazon Kids+ Special Promotions
Prime Try Before You Buy First Box Checkout
Amazon Music Unlimited Monthly Subscription
Amazon Music Unlimited Digital Bundle
Amazon Prime Video Free Trial
This post contains affiliate links. As an Amazon Associate I earn from qualifying purchases


